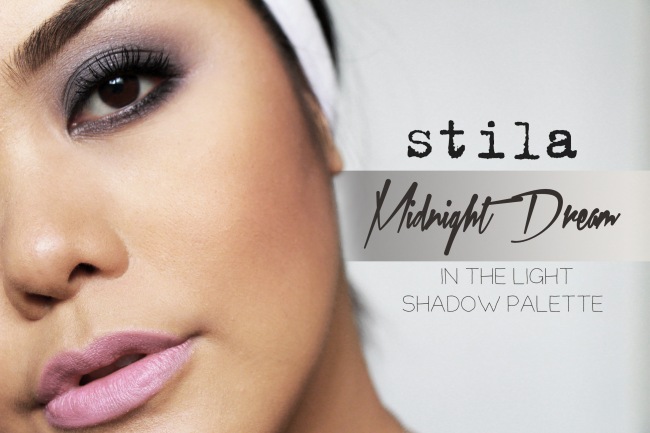
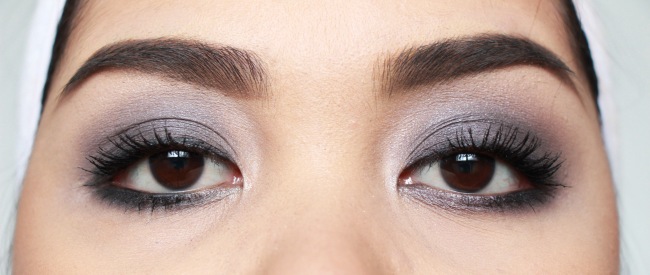
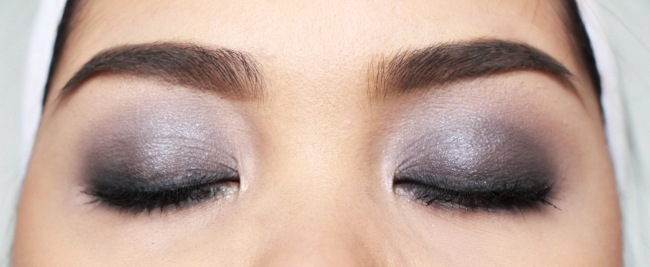
This look is created with the Stila in the LIGHT eyeshadow palette based from the beauty look book that came in with the kit.
I figured some of us may be curious as to how these suggested looks would actually translate when worn, so I'm going to do just that. I may have also added last few steps which was: extended "Night Sky" on the lower lashline and used "Ebony" to add depth to the look as well as used "Kitten" as highlight only because the book doesn't really include those steps and I personally felt like it needed those few extra touches.
Actually, in the next videos I'm going to be uploading a few more looks referring from the same beauty look book, using the same eyeshadow palette. While this is helpful as to showing you some makeup ideas, I could also share some helpful tips as to how you can maximize the color range of your eyeshadow palette and what other ways you can use it for :)
So, here's the link to the video I did of the makeup look:
1. I started off by priming my eyelids and then applying "Bare" all over the eyelids up to the brow bone as the base.
2. Next, with a flat eyeshadow brush I applied "Night Sky" on the entire lid and softened the edges with a blending brush. If you want to make a more intense color, just apply more eyeshadow by patting over your eyelid. Do not forget to blend afterwards.
3. with a small eyeshadow brush, extend "Night sky" across 2/3s of the lower lashline and blend.
4. with the same brush, apply "Ebony" just on the outer 1/3 of the lower lashline. If you would like a more intense look, you can add ebony on your crease and then blend upward.
5. With your black kohl pencil of choice, run a line on your lower waterline as well your upper lashline. Diffuse this with a small eyeshadow brush.
6.Take "kitten" and apply on the inner corner of your eye as well as the brow bone with another eyeshadow brush and blend.
7. Finally a couple coats of your favorite mascara and/or false lashes, and you're done!
The key to every smoky eye is the blending, so be patient when you do it, it pays off really, really well when you do take time and make sure your application isn't streaky.
I hope this has been helpful and interesting to you. If you have questions, comments and suggestions; please feel free to send them my way. :) I'm also on Facebook and Instagram.
Until next time! :D
XOXO,
Gia


No comments:
Post a Comment