Saturday, May 31, 2014

Blogged: One Eyeshadow Smoky Eyes

As promised, I will be sharing with you guys a One Eyeshadow Smoky Eye look using the Anastasia Beverly Hills Lavish Palette. Which you can find on this video, right here.

I have been loving this product since I got it and I can't wait to share with you guys the looks and combinations that you can create using this palette. This is just the first of many possibilities, not to mention very simple.
Personally, when doing one shadow smoky eye looks, I tend to lean towards the purples, mauves, darker browns and blues (never really an intense black (unless an occasion calls for it) but here's a sample of a very light and wearable, romantic smoky eye that's quick and easy to do.
ImageImageImage
Products used:
Face:
Urban Decay Surreal Skin Creme in Mirage
Ben Nye Neutral Set
Nyx Full Coverage Concealer in Beige
Nyx Blush in Taupe for contouring
Nars Foreplay Cheek Palette
Eyes
Urban Decay Primer Potion in Sin
Anastasia Beverly Hills Lavish Palette (Thank you @nicolettemakeup on instagram)
L'oreal Super Liner
The Face Shop Freshian Volumizing Mascara
PAC Cosmetics Eyeshadow Pencil in White Floss
Lips
Nyx Soft Matte Lip Cream
Makeup Forever Fascinating Lip Gloss
That's it for this blog post, Thank you for watching the video, please go see it if you haven't already. Do, like it, don't forget to subscribe! I hope this was helpful to some of you and I will see you all again next time.
XO
Gia

Friday, May 30, 2014

Blogged: Finally going on youtube! - Warm Neutral Smoky Eye

Hey guys!
So I have finally given in to youtube, you should be able to find me on www.youtube.com/beautybygialalu and I'm going to try and make it a habit to post makeup tutorials, product reviews and whatever else that I feel can and should go on there. I did make a channel some 4 or 5 years ago when I was just starting with makeup but the quality on those videos as well as the overall choices that I did on those videos are not something I'm proud to (re)share, but I give myself props for at least trying, how about that?
I have nothing in mind to begin with on my channel, so I thought... why not a very versatile Warm Neutral Smoky Eye look?
I'm still getting a hang of the captions and figuring out how I can add actual narrations on the videos but for now, I hope this video will do. On the video, I will be mainly concentrating on how I did the eyes and I guess I can come up with a better video of how I did the rest of face.
I provided the list of products on the description box below the video. One thing though, because I haven't really configured the lighting settings and everything else that should be right on this video, I went and used a darker color foundation in such a way that the camera picks up a consistent color as my natural skin color. When the lights are off though, my makeup is borderline stage makeup / TV makeup, almost like how I wore it when we were doing Mega Fashion Crew tapings, which by the way is not always how full my makeup is.
Moving on! :)
The video should be informative of my technique in achieving this look, if you have questions you can direct them here on my blog or via my facebook page or better yet, on youtube! :) The look (or I guess, every one that I will post on the channel) is a mix of high, medium and low end products just because I've never really been "brandcentric" or brand conscious as to the products I use, I'm always more concerned about the product performance, color pay-off, staying power and all those relevant factors.
So, before I let you go, here's a photo of my finished look on the video and I will talk to you guys next time!
ImageImageImage

Blogged: Stila Midnight Dream - Gunmetal gray smoky eye look

Image

This look is created with the Stila in the LIGHT eyeshadow palette based from the beauty look book that came in with the kit.
I figured some of us may be curious as to how these suggested looks would actually translate when worn, so I'm going to do just that. I may have also added last few steps which was: extended "Night Sky" on the lower lashline and used "Ebony" to add depth to the look as well as used "Kitten" as highlight only because the book doesn't really include those steps and I personally felt like it needed those few extra touches.
Actually, in the next videos I'm going to be uploading a few more looks referring from the same beauty look book, using the same eyeshadow palette. While this is helpful as to showing you some makeup ideas, I could also share some helpful tips as to how you can maximize the color range of your eyeshadow palette and what other ways you can use it for :)
So, here's the link to the video I did of the makeup look:
1. I started off by priming my eyelids and then applying "Bare" all over the eyelids up to the brow bone as the base.
2. Next, with a flat eyeshadow brush I applied "Night Sky" on the entire lid and softened the edges with a blending brush. If you want to make a more intense color, just apply more eyeshadow by patting over your eyelid. Do not forget to blend afterwards. 
3. with a small eyeshadow brush, extend "Night sky" across 2/3s of the lower lashline and blend.
4. with the same brush, apply "Ebony" just on the outer 1/3 of the lower lashline. If you would like a more intense look, you can add ebony on your crease and then blend upward.
5. With your black kohl pencil of choice, run a line on your lower waterline as well your upper lashline. Diffuse this with a small eyeshadow brush.
6.Take "kitten" and apply on the inner corner of your eye as well as the brow bone with another eyeshadow brush and blend.
7. Finally a couple coats of your favorite mascara and/or false lashes, and you're done!

ImageImage

The key to every smoky eye is the blending, so be patient when you do it, it pays off really, really well when you do take time and make sure your application isn't streaky.
I hope this has been helpful and interesting to you. If you have questions, comments and suggestions; please feel free to send them my way. :) I'm also on Facebook and Instagram.
Until next time! :D

XOXO,
Gia

Blogged: Purple Haze - Violet and Turquoise eyes

thumbnail4
It's summer and I thought I'd create a makeup look that's fun, colorful and playful as the season! It could be a really nice look for your evening affairs or an interesting play of color to your normal daywear. Click here to checkout the tutorial on Youtube
Colors used on the eyes are all from Sleek, first one is the Acid Palette, the other one has been discontinued, and I couldn't even tell which palette it is because the name has rubbed off the packaging :p
Before we get into details of the tutorial, let me just mention that right after this one, maybe later this week I will be posting another look using the Sleek Acid palette, just to express how much I love these little ones!
Speaking of loving these eyeshadow palettes, I have about 7 of them right now and I'm still getting around to purchasing each one that they came out with (or actually, the ones, I like), so I will in the future post some makeup ideas using these babies! "Shangri-la" and Ultra Matte V2 are my absolute favorites! Which ones are yours? :) I'm also into their True Colour lipsticks which found it's home in my professional kit, but my favorite shades are  Mystic, Vamp and Mulberry.
Now! On to the featured look!
Personally, I'm a sucker for neutral to dark colors in terms of makeup, but I'm drawn into every kind of color which is practically one of the reasons why I became a makeup artist. This look, not only a playful take on a smoky eye, it's also very good for brown eyes, and I believe, regardless the skin color should look really nice.
Products used:
Eyes
Sleek eyeshadow palette in Acid
Sleek eyeshadow palette (a discontinued one that I can't even recognize)
The Face Shop Freshian Volumizing mascara
L'oreal Super Liner in Brunette for the eyebrows
Lips
Sleek True Colour Lipstick in Peaches and Cream
Face
L'oreal Visage Lift in 107
RCMA Colorless Powder
Covergirl Clean Pressed Powder in Tawny
Nails:
Revlon Parfumerie in Tropical Rain
Here's a closer look:1243

There you have it! I hope this look gives you an idea and I'd love to see you try this look as well. It doesn't have to be the same products, you can go ahead and use products you already have or if you have the same products, this could be a good variation or idea on how else you could use your products.
I hope this has been helpful to some of you and I will catch you guys next time! Please don't forget to subscribe to my Youtube channel, Follow me on Facebook and Instagram while you're at it too!
XOXO,
Gia

Blogged: Sleek Summer Sunset - Sleek iDivine Acid Palette


Image

It's bright, it's neon, it's the Sleek Acid eyeshadow palette!
I got this palette when it first came out, and I honestly haven't used it a lot because of how bright the color selection was, I was able to use some of the colors in a photoshoot, and it came out really nice. If anything though, these colors were particularly more powdery than the other eyeshadow palettes that sleek carries.
Anyway! This bright eye look is another idea, great for the season (summer/spring) and also an idea of how you can play with the colors if you ever have the Sleek Acid palette, I used 4 colors from the palette (names, I lost because the name strip that came with the palette went missing) and used different products on the face as well as with the eyebrows, cat eye liner and mascara.
What's funny about this video was that, I was using for the first time, my Dior Skin nude as a contouring product to keep with the sheer coverage the MAC face and body foundation provided. However, I put on too much product that I discolored half of my face,haha! that mother was really pigmented but very very workable and blendable, So what I did was take the buffing brush that still had on some MAC face and body and buffed it over where I messed up my contour, and voila!
Products used were:
Eyes:
L'oreal Super Liner in Brunette for the eyebrows
Tarina Tarantino dollskin eyeshadow primer
Sleek iDivine Acid Eyeshadow Palette
Smashbox Jetset eyeliner in Deep Black
The Face Shop Freshian volumizing mascara
Face
MAC Face and Body Foundation in C2
Dior Skin Nude in 51
Ben Nye Neutral Set
Lips
L'oreal Color Riche lipstick in Dewy Beige (which is not an actual pink)
So, there you go ladies! Video is up on my Youtube Channel, be sure to check it out!
I'm also on Facebook and Instagram if you're into that. If you have any suggestions, comments, or if you wanna share with me a look you did inspired from one of these looks in my blog, do share them with me! :) email me at makeupbygialalu@gmail.com
I hope this was helpful to some of you, Thanks for reading and see you next time!
3
a
 <a href="http://www.bloglovin.com/blog/12345741/?claim=6yteeq56mym">Follow my blog with Bloglovin</a>

Review: Anastasia Beverly Hills Lavish Eyeshadow Palette

This is my first time to do a review here and as excited as I am to go into thorough detail of this charmer, I also wanted to be informative, short and concise for you guys.
So I'm going to discuss with you some of the more relevant and details that could be of interesting to you as well :)
First up, let's talk about the Packaging!
I am so into the sleek, slim and lightweight cardboard packaging of this palette. It comes in a sleeve that contains your little magical eyeshadow palette :)
It's great for when you are packing light for client jobs, fashion shows. For personal use, this is also great because you can take it with you when you are travelling, lots of possibilities and combinations you can create with this selection.
Image
Anastasia Beverly Hills Lavish Eyeshadow Palette
Image
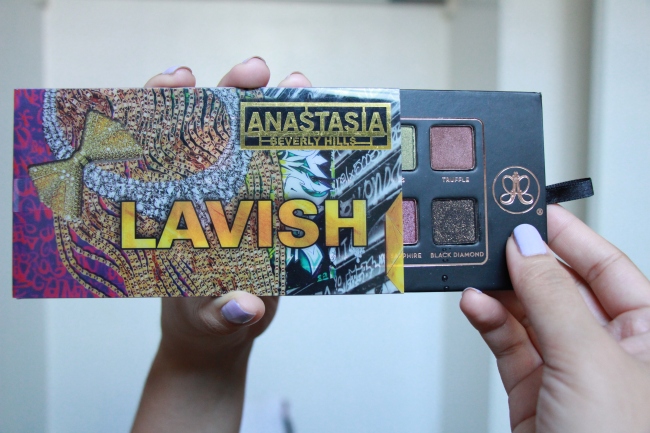
Sleeve pull-out cover that reveals the actual palette
Image
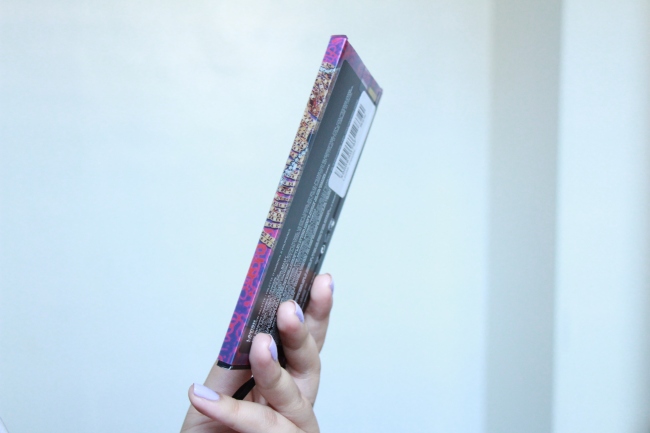
Very slim, sleek and lightweight cardboard packaging
Image
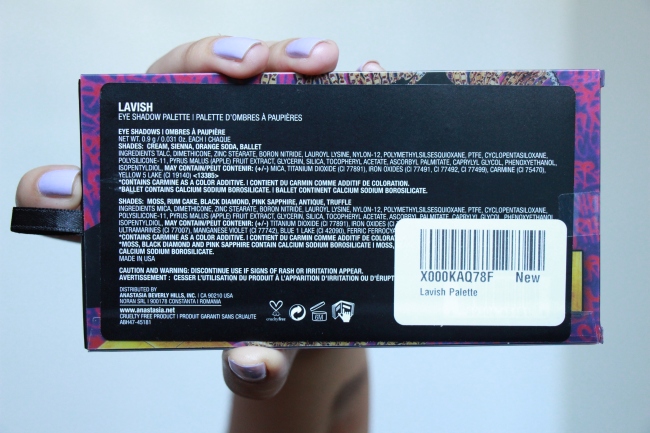
Back of the palette which details the warnings, ingredients and contents of the palette. and Yay! they don't test on animals! :D
Next will be Color selection and pigmentation.
The palette comes with 10 shades, All of them very beautiful, 8/10 blendable, 9/10 were very pigmented. Each one of these are almost true to color as you swatch and apply them on your eyes, some of the colors, actually are more opaque and pigmented when applied with a brush and even more so on primed eyelids. But yeah, let me go ahead and describe each one of them for you.
Image
Cream - is a diffused, very light beige-pink or a peach tone. It's matte and has a warm undertone. This particular shadow gave very little fallout.
Antique - is a cool toned, taupe-gray color. I would say the texture/finish is frosted and the texture is amazingly smooth and buttery. this one didn't have any fallout when I tried it on a makeup look :)
Rum Cake - is a copper-brown, frost color, I could pick up some brick or orange warmth in it and this one was very true to color and the pigmentation was great.
Moss - is an olive green-moss, very light brown or a maybe a bit of gold undertone to it. This one is slightly frosted, but it's not exactly satin, it was smooth on application I kinda feel like it looked like a green vein on my eye, so I was careful about mixing it with other colors to avoid looking like I have a healing black eye or bruise on my eye.
Truffle - is a warm, medium brown with some gold in it. The texture was smooth, and has to be my third favorite color in the palette.
Ballet - is a peachy-pink color, but more on the pink side. It has some tiny silver glitter or shimmer in it, but it's more or less matte in texture. This isn't my favorite one, at all because it was powdery and showed very little to no pigmentation, it just left a track of silver speckles where I applied it.
Orange Soda - is a light yellowy-orange, matte shade. I haven't given this a go yet, just because that's the point, this color may not be the first one you dip your brush onto when you reach for this palette. When swatched though, it gave some really obvious fallout.
Sienna - is my love. it is my absolute favorite in the bunch. I am a sucker for warm, copper-reddish-brown matte colors and I have been searching and searching for one that doesn't make me look like I'm sick. :p The pigmentation, texture and blendability is absolutely amazing, you guys! I could go on and on :)
Pink Sapphire - is a plum-wine, coppery-brown-purple if that's what I'm seeing. there's hint of gold shimmer in it and maybe a green as well with some light. The texture is very good and smooth.
Black Diamond - is my second favorite in the bunch. It's generally a blackish-brown with very fine gold shimmer, but glides on your skin very matte and soft. the color pay-off was awesome and the texture was ok, but I couldn't tell you so much about the blendability. It stuck where I applied it and I had to use my smallest bullet brush to blend it out because the fluffier one didn't seem to reach it and distribute the color.
Over-all, I thought this palette is great. The color range was wide for 10 colors. There's a good mixture of mattes, shimmer and frosts, the color pay-off on almost all of them were great and for the price, the convenience and the performance of these shadows, I'd give it 4 out of 5 stars, just because of the sleeve part of the packaging. It isn't my favorite way of how to preserve and keep an eyeshadow palette.
The price range of this palette is between P2,000 to P2,500 in the Philippines. This could be purchased from online sellers, they could be on hand or available on pre-order basis as this product was from the USA. I particularly got mine from @nicolettemakeup on instagram for a very good price.
That's it for me and this review. Please stay tuned because I will be posting a video soon on achieving a gradient One eyeshadow look using the Anastasia Beverly Hills Lavish eyeshadow palette.
Thank you for reading, I hope this was helpful to some of you and I will see you all again next time!
XO,
Gia
 

Template by BloggerCandy.com